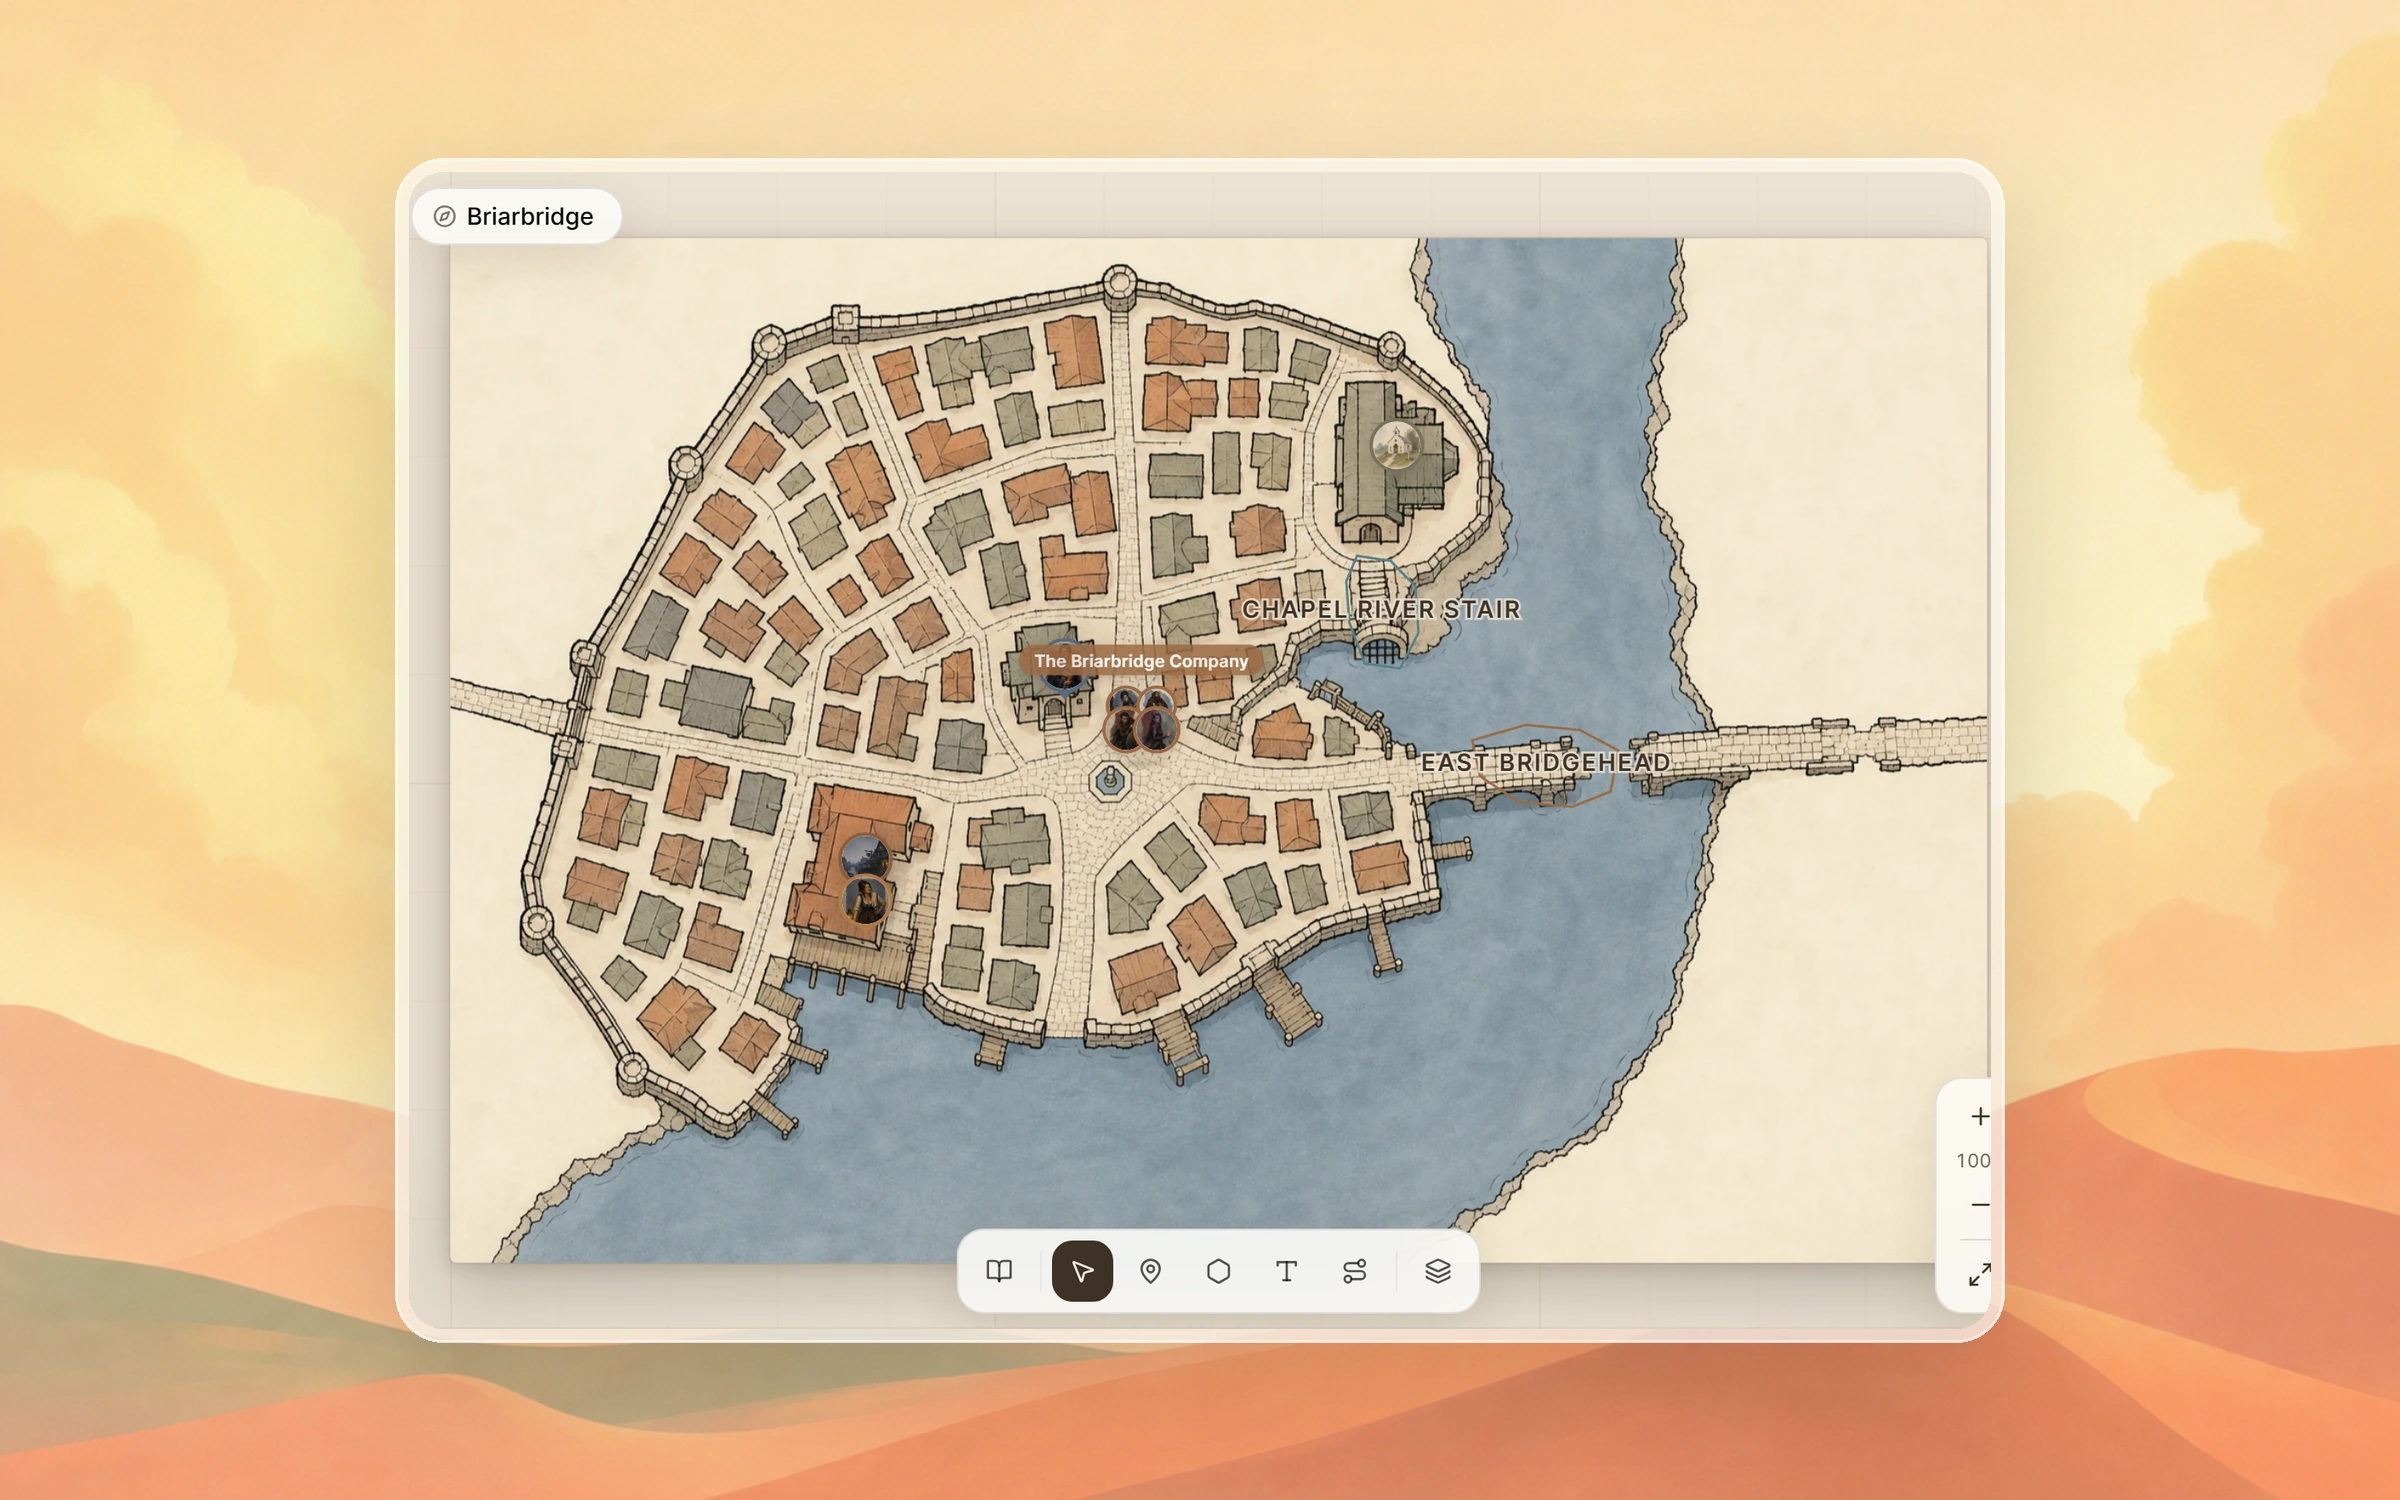
By the time you finish this guide, you will have a map of your world where each pin opens the page it matches, plus a version your players can browse on the campaign wiki.
Begin with any map image
Saga20 accepts the map you already own. It could be one you sketched by hand, a file exported from a tool like Inkarnate, or a phone photo of the sketch from your table. Images in PNG, JPG and WEBP formats, up to 25 MB, all work.
Begin with the widest map you have, usually the region your campaign calls home. When a map covers a single place, a city for example, link it to that location as you make it. Pins and areas on larger maps can point into it afterward.
Show me the Maps section, opens in a new tab
Pin your world onto it
A pin links a spot on the map to a character, location, faction or item in your World Builder. It carries that page's portrait or icon, and opens a card holding the opening lines of its description plus Open page. Add from your world in the toolbar lets you drag entries straight onto the spot they belong.
You can also place an unlinked pin, for a ruin the party has only heard rumors about, and link it once it has a page.
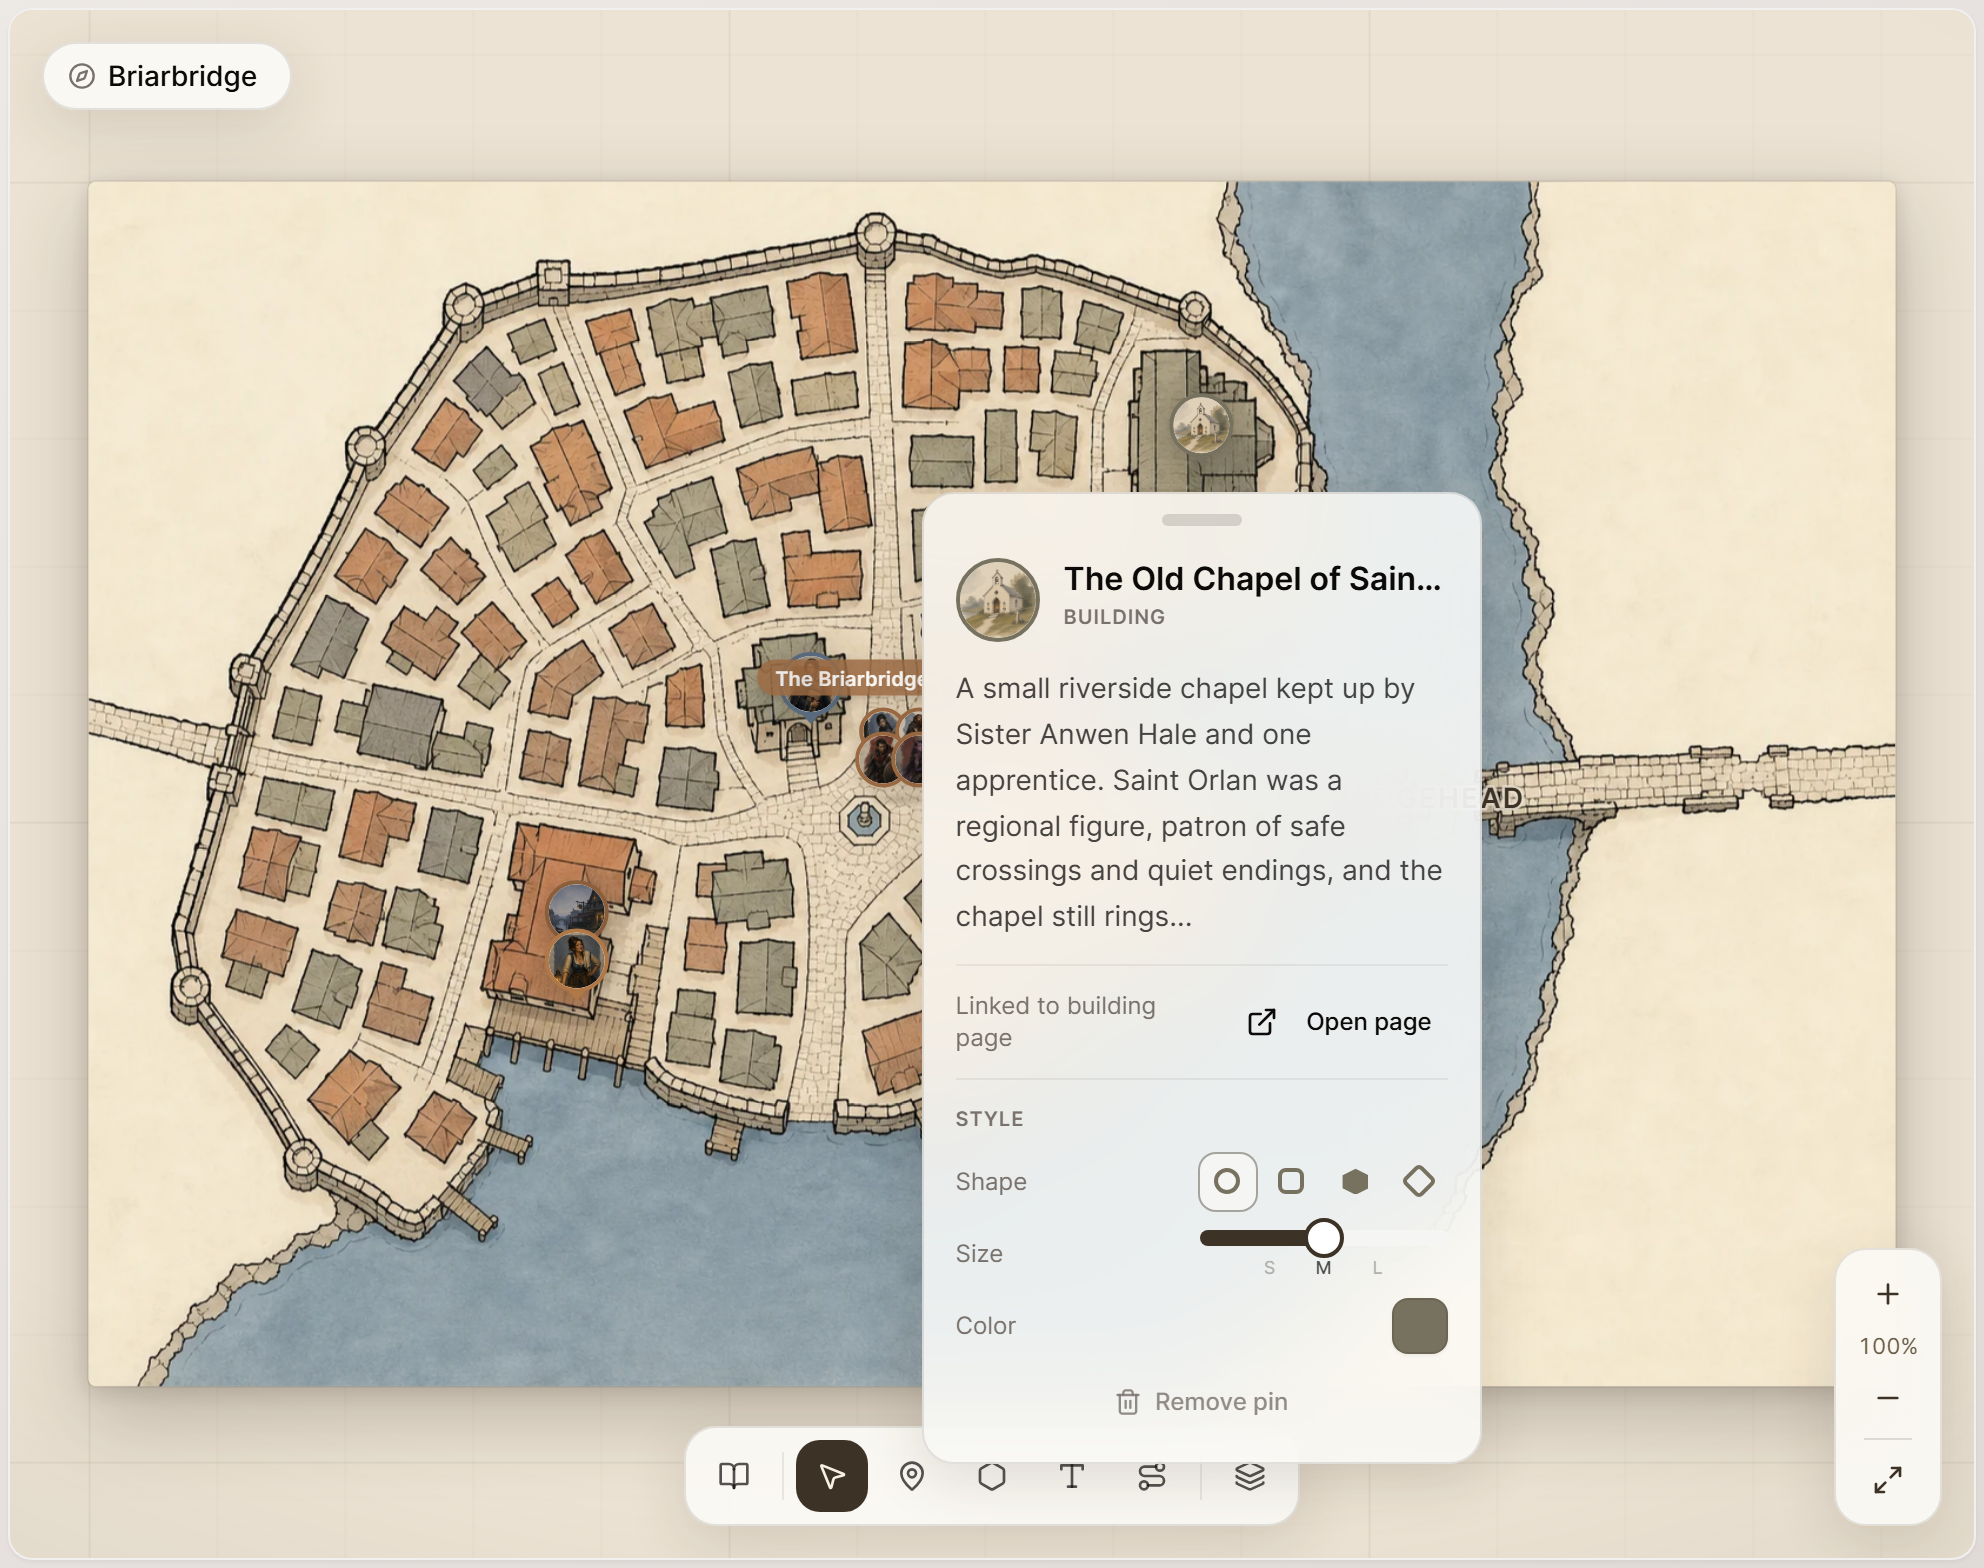
Mark regions, roads and names
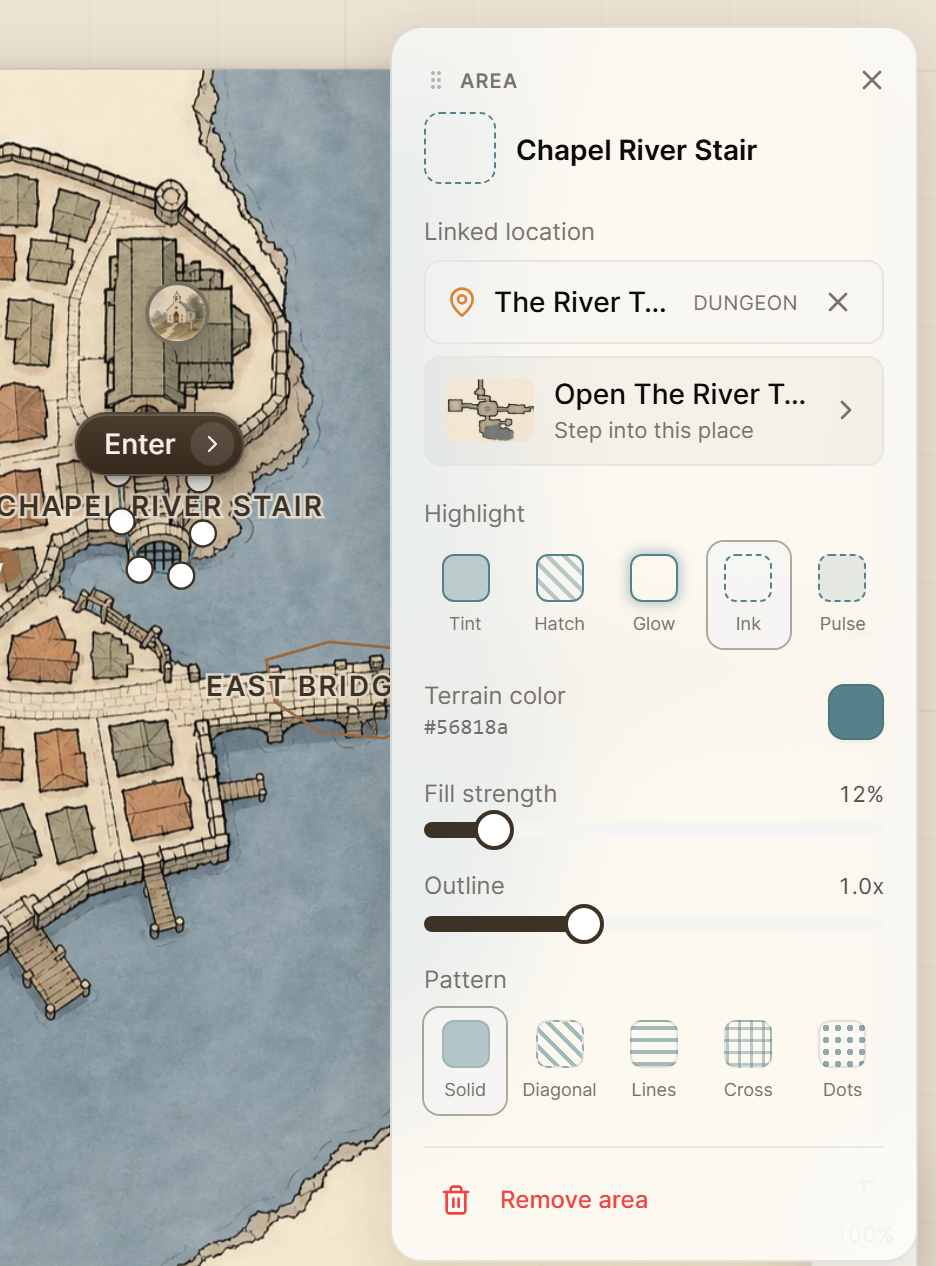
Three more tools sit in the toolbar at the bottom of the map, and each shows its shortcut key when you hover it. Shape an area marks out a region: click to add points, then click the first point again to close the shape. The panel that appears next to it sets the name, a highlight like Tint, Hatch or Glow, the color, and the strength of the fill and outline.
Draw a route traces a road or a journey. Click to add points and press Esc to finish, then choose a marching, solid or dotted line. Place a label writes a name directly onto the map in small, medium or large text.
Layers and grid turns whole layers on and off, sets Marker size for all pins at once, and lays a square or hex grid over the map using Snap to grid. Under Atmosphere it can add drifting clouds as well. The map saves as you work. Press Ctrl+Z on Windows or Command+Z on macOS to undo your last change.
Track the party
Once your campaign holds player characters, right-click the map and choose Place the party here. The party marker groups their portraits in one spot. Select it to open the roster, where you can name the party, hide a character sitting a session out, and check when the party last moved.
Drag the marker as the party travels. When the next session begins, your players can see where they stopped.
Step into maps inside maps
You can open a map linked to a location from any bigger map. A pin for that location gains Enter map on its card, and an area linked to it shows Enter once you select it. Inside, a trail at the top left follows the location's parents, from region to city to the cellar beneath the inn, and a button at the bottom left takes you back up.
The trail follows the parent you set on each location page, so set a city's parent to its region and the maps line up. Every location can hold one map.
You can also create a map from a bigger one. Select an area linked to a location, choose Add a map for this place, and Saga20 builds an empty map for that location and opens it, ready for the artwork.
Share it with your players
Maps appear on your campaign wiki once you switch the wiki on. Players pan and zoom, open a pin's card to read the page behind it, and step into nested maps by way of their linked areas.
A pin tied to a page you hide from the wiki stays off the wiki as well. Hide from wiki in a map's three dots menu keeps a whole map to yourself until the party finds it.
To spread a map across the front page of your wiki, open the wiki, select the cog for Owner settings, and pick it under Featured map.
Pin the places the party has visited rather than the whole world, and add to the map as the campaign continues.